The Weather Station
It all started more than five years ago the day I decided to buy my very own weather station. I ended up with La Crosse Technology WS-2800-IT. You can still find it on a market under various brands like TFA, Techno line,..
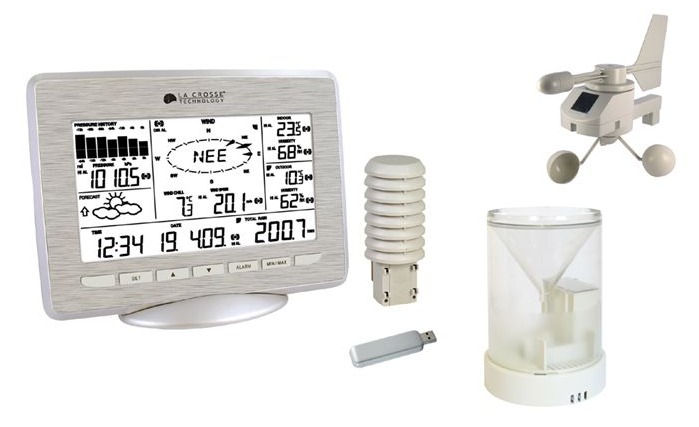
It enables wireless data transmission to PC using USB stick, which made it good candidate for my future sensor network.
The Local Server
Of course I needed a local server collecting regularly the data and sending it to my virtual server in the cloud. The requirements were Windows OS and standard USB socket.
I picked for that one of the first MS Windows tablets MSI WindPad 100W.
Honestly, I can hardly imagine using it as tablet, but for a server it was quite good choice.

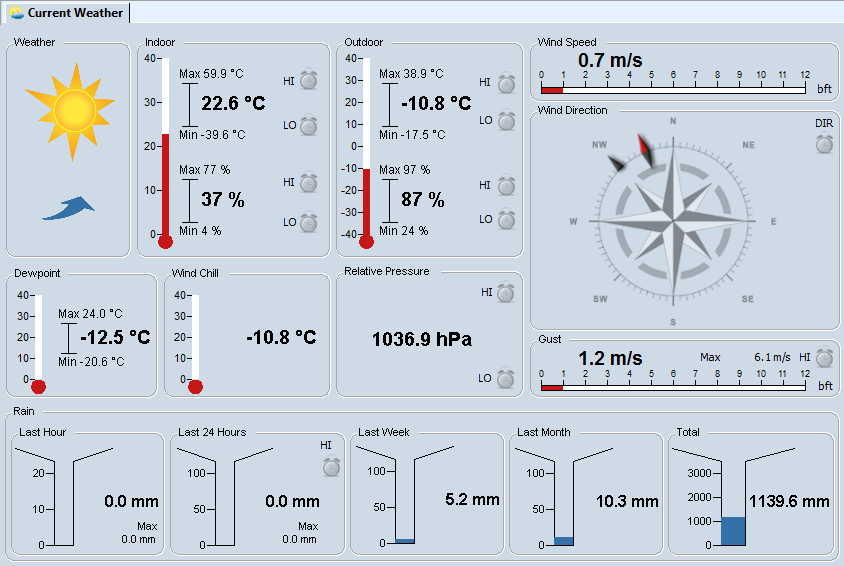
There is permanently running desktop app Heavy Weather PRO showing on the screen the data from the weather station.
 Thanks to batteries it can easily run even during electricity failures without any impact on automated data flow.
The Cloud Server
I really want to use some nice Cloud SQL service but there is always good reason for postponing that. It is still much cheaper to rent some tiny Virtual Server and install MySQL on it. That’s exactly my current setup for the cloud server. Using some base VPS from local provider here in Czechia, Wedos
The Data Flow
It is designed in such way so the process is fully automated and no manual interaction is needed including cases of:
1. Weather station is disconnected and the source file cannot be updated
2. Internet Connectivity is lost and the data cannot be sent to the cloud server
To fix the first risk, it’s necessary to avoid repetitive sending of the last available measuring from the station. A simple view can guarantee this.
To cover the second one, there is a local buffer accumulating the data until the internet gets reconnected.
So I ended up with the solution described on the picture below:
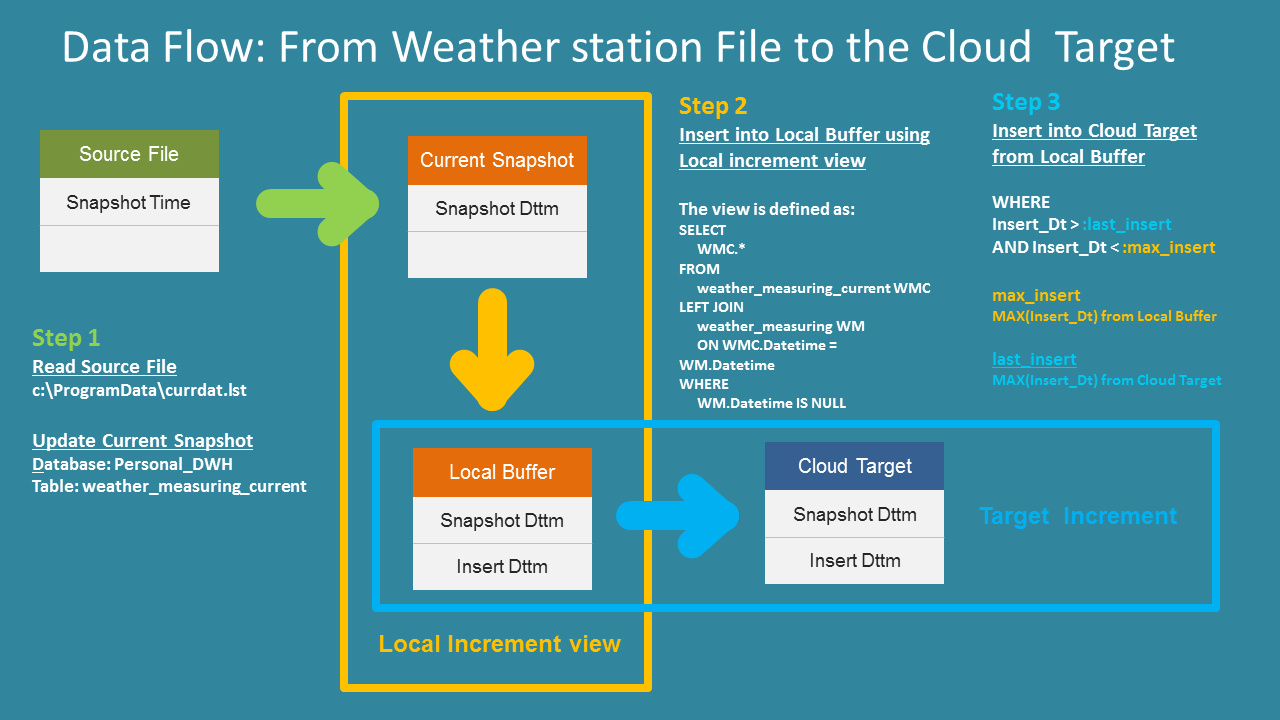
There are 3 steps. The flow starts with the file currdat.lst generated by Heavy Weather PRO, the app mentioned earlier. The file is usually located at C:\programData
Then data moves to SQL database, first transforming the file to actual data snapshot in a table and then incrementally building the history of weather measuring. The history is temporarily stored in the local buffer and then delivered to the final destination in the cloud server.
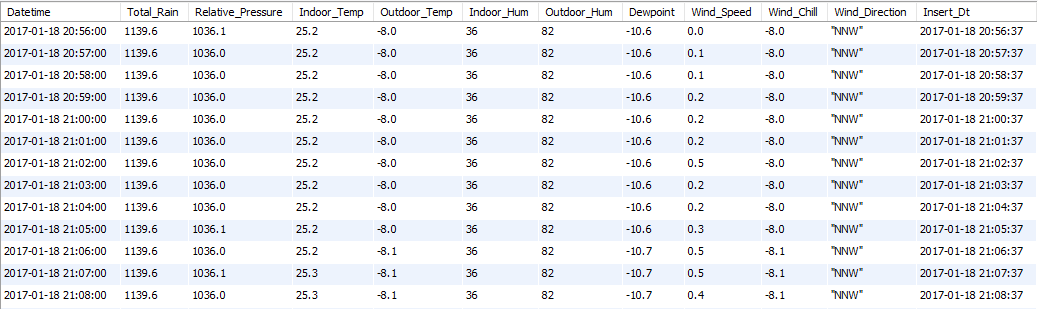
This is how the data looks in both local buffer and the cloud target (table weather_measuring):
SQL Platform
As database platform for both Local and Cloud server I use old good MySQL. Actually, I already switched to MariaDB, recent fork of the MySQL. The main reason was that in MariaDB it is still possible to disable innodb support which I don’t need for my personal DWH. Later I started to like MariaDB also for other reasons.
Public GitHub Repository
Definitions for mentioned database objects can be find in public repository on GitHub personal_dwh
personal_dwh/detail_layer/db
The (ETL) Jobs
I split those 3 steps into 2 jobs: 1. Weather load: Update current snapshot (step 1) and load local buffer (step 2) 2. Weather rupload: Load the cloud target and clean old data in the local buffer (step3)
Each job is one short powershell script. Called through standard .bat file like
powershell -command "& 'C:\personaldwh\weather_load.ps1' "
All scripts are available also in the repository mentioned above:
personal_dwh/detail_layer/jobs
The execution scheduling is done simply using Task scheduler.
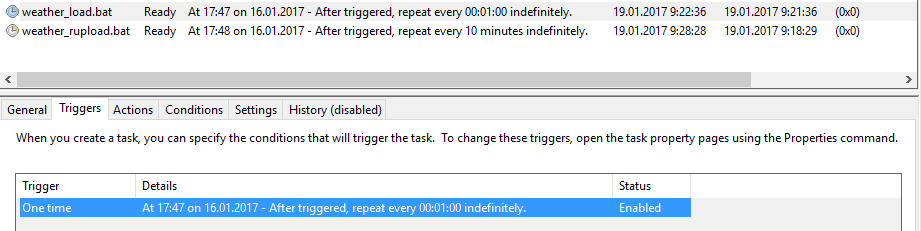
The first job is scheduled to be executed every minute. The plan for second job is to run each 10 minutes. If second job, for any reason, cannot connect to the cloud server, then the local buffer is just accumulating data. It can be few hours or even several days. The next execution after reconnecting will catch up all missed loads.